Another tutorial that need no words:
Finally, glue it on any jewelry base you like: earring, ring etc.
(source: LiveMaster.ru)
Another tutorial that need no words:
Finally, glue it on any jewelry base you like: earring, ring etc.
(source: LiveMaster.ru)
I found this easy tutorial on a Russian site. Although I don’t speak a word in Russian, the pictures talk for themselves. A clay extruder will be needed though.
A thicker tude is extruded, which will be in the inside of the cane, and many-many thin tubes that come around the thick one. Then they are twisted and pinned through on the ends. I also used some liquid clay to stick them together and make sure they won’t fall apart. Then bake on a round metal piece and maybe give a shine in the end.
(source: http://www.livemaster.ru/topic/120243-vitoj-braslet?msec=2)
In my first post I talked a lot about not buying expensive tools especially designed for clay. I stick to that, although there are a couple of tools everyone wants to have after starting working with clay. One of them is the clay extruder. It helps you push out different shapes from clay which you cannot achieve by only rolling it.
Of course there are cheaper and more expensive ones. My experience is that the cheaper one gave me a hard time untill my fiance found a way to solve this issue – it wasn’t easy though.
This is it. You put clay inside the tube, then you place the handler on top of it and push! And unless you are super-powerful, it will be almost impossible to push the clay out.
Obviously, this one would have been a better choice (now I know), but of course this is much more expensive:
Here you have a T handle and you don’t push the clay, but rotate the handle, so you need less effort to push the clay out. It’s much easier.
And finally this is how we worked out to use the cheaper one:
We had this extruder thingy and after some failed tries we finally managed to place the small extruder into the big one, so now I can extrude as much clay as I wish without much effort. 🙂
The next tool is the pasta machine.

There are pieces especially designed for clay, but a simple pasta machine (designed for pasta obviously) does the same trick. I mean it. Really.
Now about techniques… Molding is one of the basics. You use your hands, mold the clay to the desired shape and use it. Simple, isn’t it? 🙂 But of course, there are things you cannot mold with your hands.
This was the first technique I tried:
This is really something worth practicing, because you will often use it during more difficult projects. And if you don’t have a pasta machine yet, don’t worry: you can roll the clay with a roller (a bottle, a glass vase etc.) you will just need to be careful to roll it to the same thickness on all parts of it.
And right after that, you can give a try to this one:
This is a 4-part video from Mo Clay on how a complete bathroom was made. Even just looking at it makes you want to create. 🙂
I’m planning such a post for a long time now. Finally I started and hopefully this won’t be the last of this kind where I can share some tips and tricks about working with polymer clay.
Working with polymer clay is an interesting hobby. You can make so many things out of it, and that is the main reason why suppliers have a wide range of accessories. You can pay fortunes to buy everything they advise you to have before you start! So my first advice is: don’t buy everything in the beginning AND don’t buy anything before you don’t feel the need. And remember: your best tool will always be your hand!
Where to start? It’s simple: browse the internet! Don’t pay for expensive tutorials and books and descriptions. My method is looking it up on Google and YouTube! You can get a great inspiration and useful ideas there. But.as always: no matter if you get started by reading a book, browsing the web, watching videos, you will have to find out for yourself what tricks and things are good for you.
Of course, as a very first step you will need clay. There are many types, all of them is just perfect and you only have to read the instructions ont he package about how to use it, how to burn it and how it should be handled.
Keep the safety instructions: don’t eat it, don’t let children eat it, wash hands after working with clay and when you burn it, avoid inhaling the air coming out of the oven when you open it.
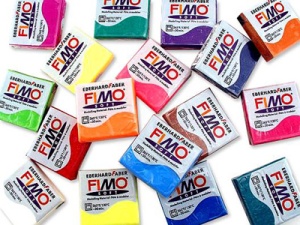
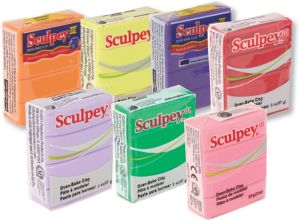
Here are some clay types I tried:
Fimo

Sculpey

Cernit

Fimo is the one that worked for me and a wide range of colors and types are available in my area, so I personally stick to that. Fimo has Classic, Soft and Effect. Classic is a harder one, Soft is obivously a softer texture and Effect, as its name shows, has an effect in it: glitter, stone-like, neon, etc.
To use clay you have to condition it first. The best tool for that are your hands. You make the clay smooth and soft mainly with the warmth of your hands.
Here are some useful tips about conditioning clay: http://www.polypediaonline.com/133688/Polymer-Clay-Conditioning
When your clay is ready, you can start the work.
Some real basic tools you will need:
something to protect your surface – The plasticizer in unfired clay can be harmful to wood finishes, and it eats into some kinds of plastic. The most common use is piece of glass or a ceramic tile, but a plastic plate pad – I bought mine in Ikea very cheap. It’s plastic, so it gets used after a while, but since it costs about $1, it’s not a big investment to change it every now and then.
a blade – you don’t need the most expensive one they offer exclusively for working with clay. I started with a pizza slicer :), then a scalpel and a blade from a cutter. The important thing is for your tool to be sharp, so that you can cut the clay nice and straight.
roller – it helps you roll your clay; again, don’t buy the expensive one, a simple plastic or glass roller is also great. I’ve seen some tutorials where they used a glass vase, cylindric shape.
And from here on, the list is endless. You can buy a pasta machine to roll your clay more professionally, buy all kinds of shape cutters to cut out shapes from your clay, you can get carving tools of all types, texture sheets and stamps, molds, waxing and coating pastes and liquids ( I still often use a simple transparent nail polish to give a shiny coat to my pieces). My only advice regarding this matter is: think twice before you buy and when you think about how you would use it, also wonder how else you could get to the same result. You can find many useful things in your kitchen or tool box, but even if you don’t find the right thing at home, visit a hardware store and/or a kitchen tools supplier first. It’s important though: tools you use for clay, never use in the kitchen again – no matter how well you wash it!
I ahve been gone for a while, doing administrative stuff. As a result, I can now proudly present my own webshop:
Also available in English language.
I also did some beading and working with clay, as a result here are the new participants of my Kitty-family:
Ring and pendant are also on their way… 🙂
So I was not publishing that often, but I was still researching, handcrafting and beading, so I will soon come with the new and interesting DIY ideas again. 😉